Here are all the cargo icons for SnowRunner. I know I keep forgetting what they are!

Here are all the cargo icons for SnowRunner. I know I keep forgetting what they are!
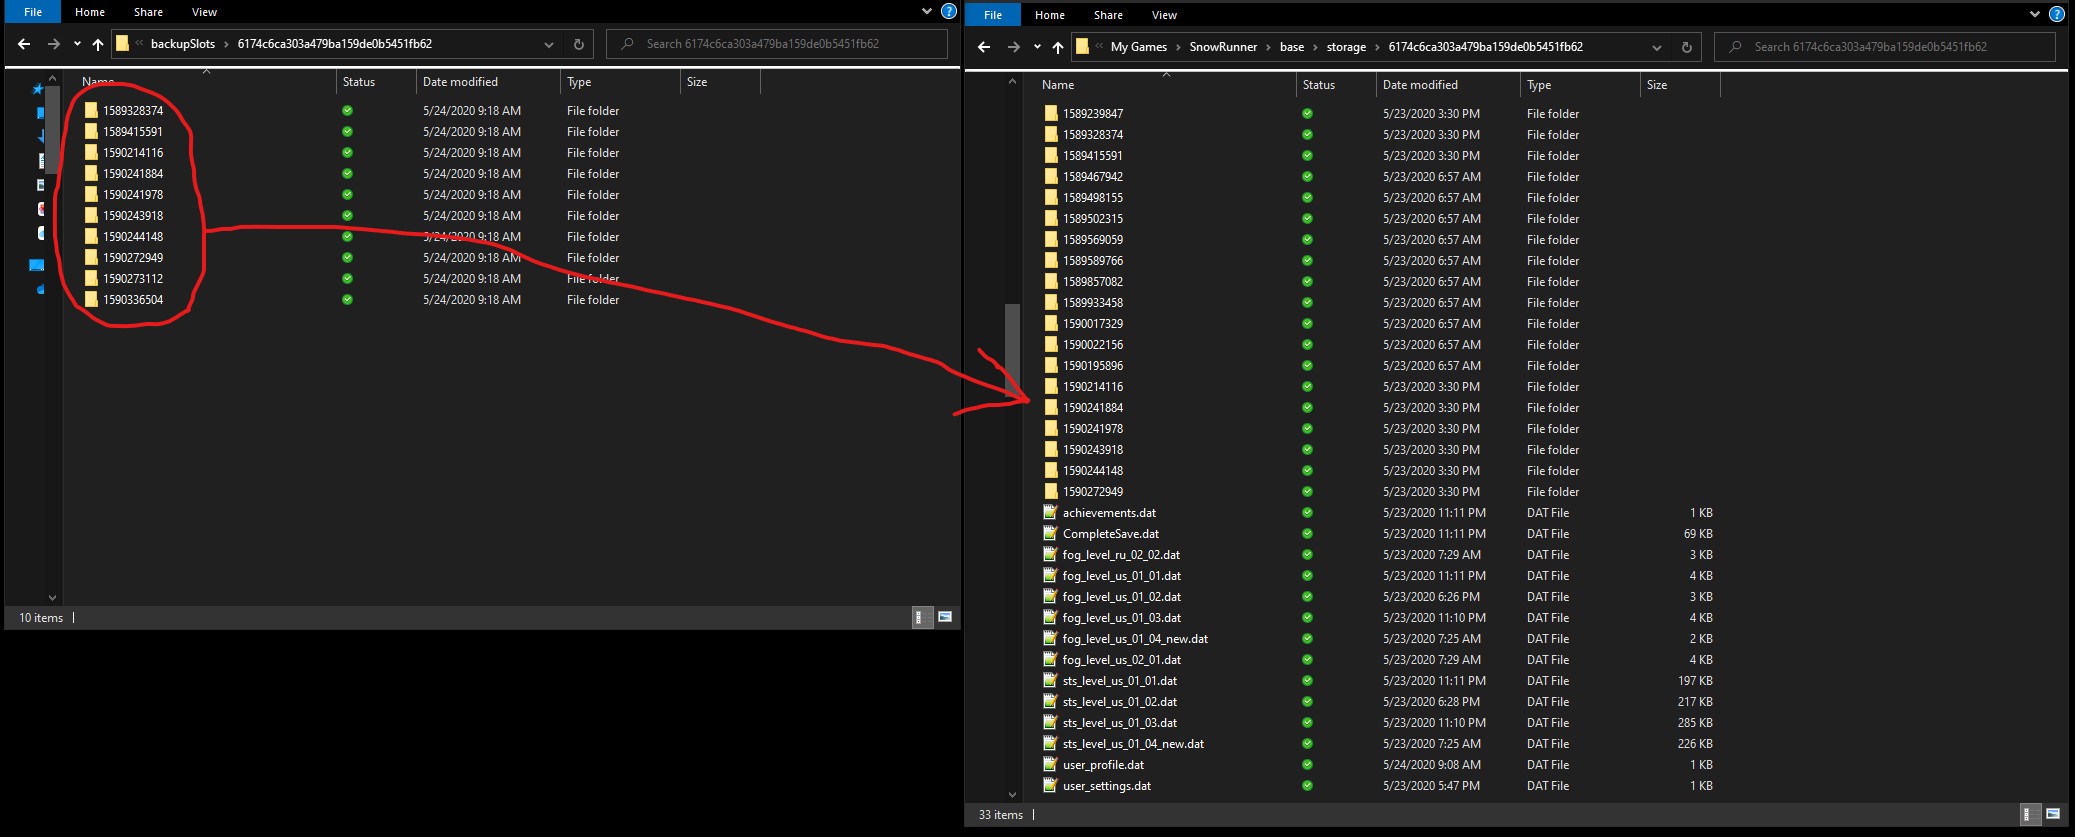
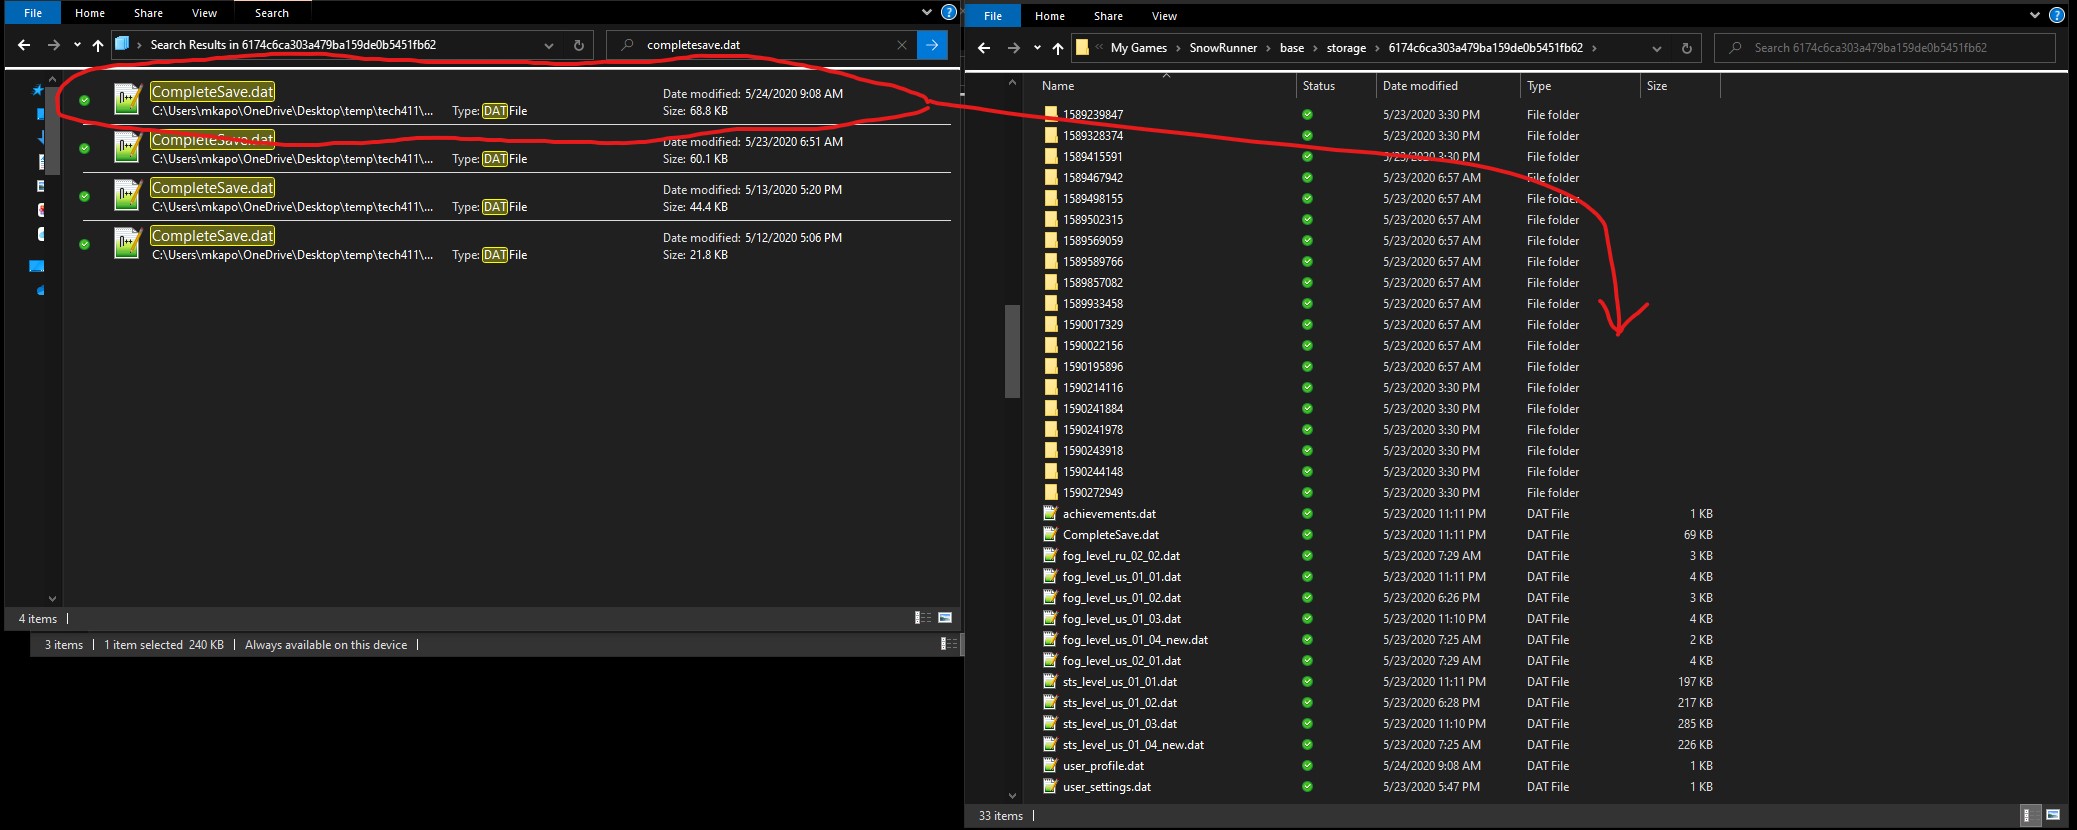
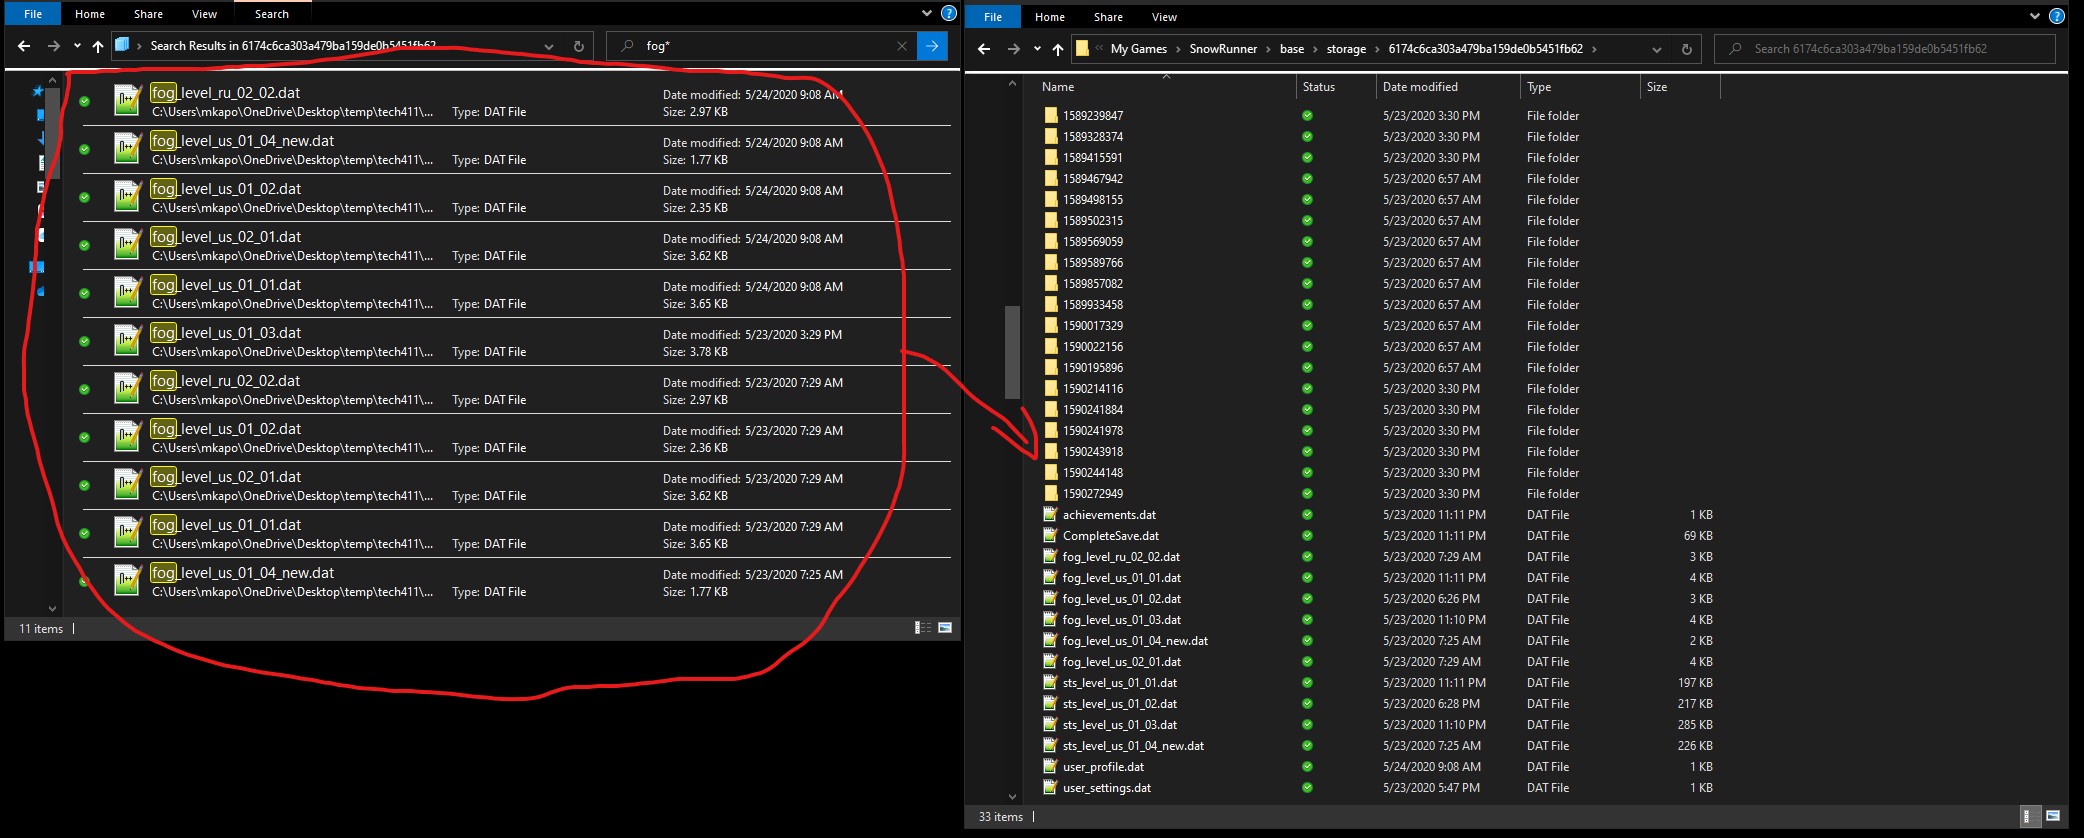
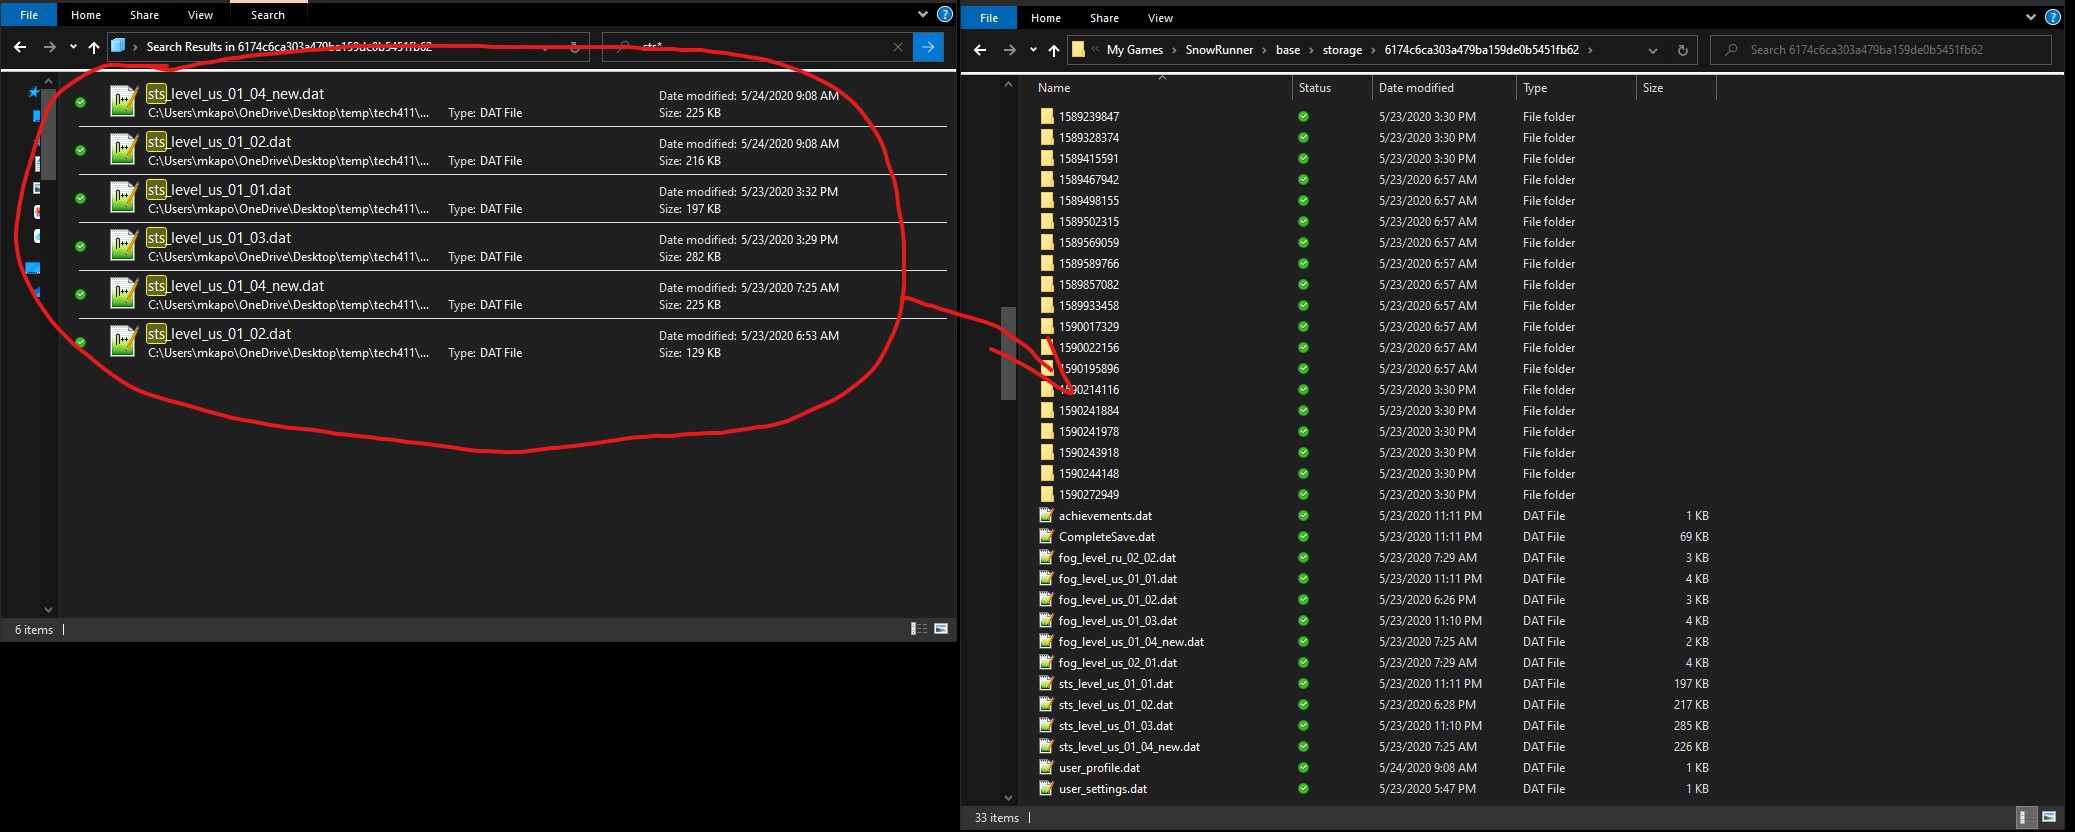
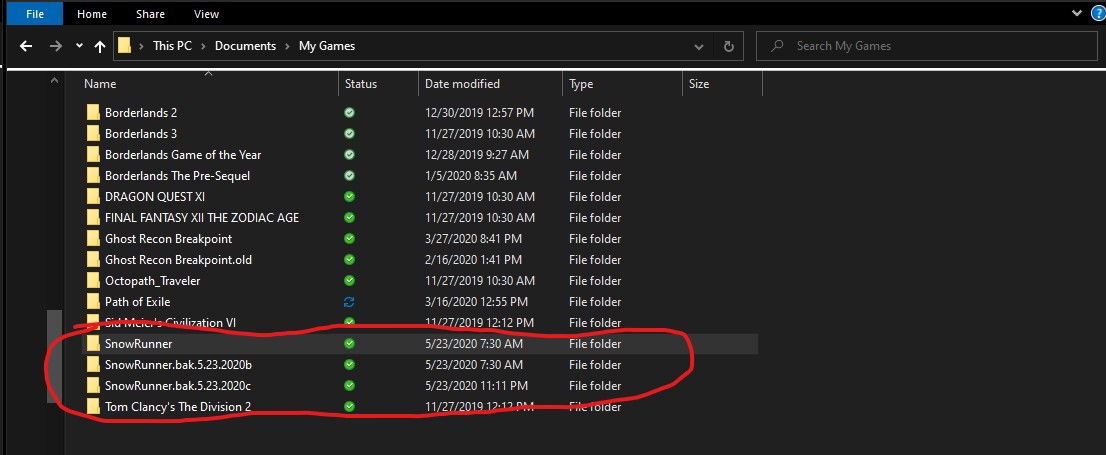
So I’ve been playing SnowRunner for a bit with my buddy and if you’ve ever played Co-op then you know that it pops up errors that you just click through until it connects. Will the other day I accidently hit new game and clicked through the error that stated that this will overwrite your current game. BAM, hours of time driving gone in a second.
Started searching the web for if there was any way to get my saved game back and came across a few about just copying over the backupSlots folder over the existing but that never worked completely. Either it just didn’t work, it worked but the fog (black area on the map) was back with no towers to unlock or just other randomness.
After fighting with it for a few hours I think I figured it out and thought I’d share it with everyone.

I recently re-installed the OS on my Laptop and immediately had an issue connecting to it remotely using my Microsoft Account credentials. I knew this worked before and I was not getting any intelligent errors regarding the failure to connect.
After doing the normal google search and reading over multiple articles and ways others have tried to fix this I stumbled across an obscure post that told me to login into Windows at least once with your MS Account password instead of the standard PIN or Windows Hello authentication that Windows 10 uses as default.
After logging in one time with my MS Account password, voila, the RDP connection started working. Hopefully this helps anyone else out there that is having this issue.
Found this article for installing a PXE server on Centos for network deployments.
NOTE: I ran into one issue that had me stumped for al long time. The PXE install would hang and after a lot of troubleshooting I added more RAM to the virtual machine I was trying to do the network install on and whammo, it worked. I added 4GB of RAM but not sure what the minimum is.
Install the following packages for setting up PXE environment.
yum install httpd xinetd syslinux tftp-server -y
Go to /usr/share/syslinux/ directory:
cd /usr/share/syslinux/
Copy the following TFTP configuration files to the /var/lib/tftpboot/ directory.
cp pxelinux.0 menu.c32 memdisk mboot.c32 chain.c32 /var/lib/tftpboot/
Edit file /etc/xinetd.d/tftp
vi /etc/xinetd.d/tftp
Enable TFTP server. To do this, change “disable=yes” to “no”.
 # default: off
 # description: The tftp server serves files using the trivial file transfer \
 #       protocol.  The tftp protocol is often used to boot diskless \
 #       workstations, download configuration files to network-aware printers, \
 #       and to start the installation process for some operating systems.
 service tftp
 {
 socket_type             = dgram
 protocol                = udp
 wait                    = yes
 user                    = root
 server                  = /usr/sbin/in.tftpd
 server_args             = -s /var/lib/tftpboot
 disable                 = no
 per_source              = 11
 cps                     = 100 2
 flags                   = IPv4
}
Mount CentOS installation ISO file to any directory of your choice, for example /mnt. I already have CentOS 7 64 bit ISO image on my /root directory.
mount -o loop /root/<ISONAME>.iso /mnt/
Next, create a directory to store CentOS installation ISO image.
mkdir /var/lib/tftpboot/centos7_x64
Note: If you want to install CentOS 32 bit edition, make a relevant directory called centos7_i386 (Ex. /var/lib/tftpboot/centos7_i386).
Copy the ISO file contents to /var/lib/tftpboot/centos7_x64/.
cp -fr /mnt/* /var/lib/tftpboot/centos7_x64/
Copy the boot files to /var/lib/tftpboot/.
cp initrd.img /var/lib/tftpboot/
cp vmlinuz /var/lib/tftpboot/
Set the proper permissions to the above directory.
chmod -R 755 /var/lib/tftpboot/centos7_x64/
Create a apache configuration file for PXE server under /etc/httpd/conf.d/ directory:
vi /etc/httpd/conf.d/pxeboot.conf
Add the following lines:
Alias "/centos7" "/var/lib/tftpboot/centos7/"

<Directory /var/lib/tftpboot/centos7>
Options Indexes FollowSymLinks
Require all granted
</Directory>
Save and close the file.
Start the Apache service and TFTP
systemctl enable httpd.service systemctl restart httpd.servicesystemctl start xinetd systemctl start tftp systemctl enable xinetd systemctl enable tftp
Then, create a configuration directory for PXE server:
mkdir /var/lib/tftpboot/pxelinux.cfg
Now, create PXE server configuration file under the pxelinux.cfg:
vi /var/lib/tftpboot/pxelinux.cfg/default
Add the following lines:
default menu.c32
prompt 0
timeout 300
ONTIMEOUT local

menu title ########## PXE Boot Menu ##########

label 1
menu label ^1) Install CentOS 7
kernel centos7_x64/images/pxeboot/vmlinuz
append initrd=centos7_x64/images/pxeboot/initrd.img method=http://192.168.1.150/centos7_x64 devfs=nomount

label 2
menu label ^2) Boot from local drive localboot
Save and close the file.
To reduce complexity, I have disabled both firewall and SELinux in my PXE server.
To disable firewall, run the following commands:
systemctl disable firewalld
systemctl stop firewalld
To disable SELinux, edit file /etc/sysconfig/selinux:
vi /etc/sysconfig/selinux
Find the line: SELINUX=enforcing and change it to SELINUX=disabled
# This file controls the state of SELinux on the system.
# SELINUX= can take one of these three values:
# enforcing - SELinux security policy is enforced.
# permissive - SELinux prints warnings instead of enforcing.
# disabled - No SELinux policy is loaded.
SELINUX=disabled
# SELINUXTYPE= can take one of these two values:
# targeted - Targeted processes are protected,
# minimum - Modification of targeted policy. Only selected processes are protected.
# mls - Multi Level Security protection.
SELINUXTYPE=targeted
Save and close the file. Reboot your PXE server to take effect the saved changes.
/etc/ssh/sshd_config:
nano /etc/ssh/sshd_config
PermitRootLogin yes. This line may already exist and be commented out with a “#”. In this case, remove the “#”.
# Authentication:
#LoginGraceTime 2m
PermitRootLogin yes
#StrictModes yes
#MaxAuthTries 6
#MaxSessions 10
/etc/ssh/sshd_config file.service sshd restart
So many years ago i bought the entire set of “Two Pints of Lager and a Packet of Crisps“. One of the funniest shows I’ve ever watched and had to look up some of the UK slang but well worth it. It was only sold overseas so the set I got was set to region 2 (PAL). Back then I had an old DVD player that I was able to reflash to be region free and play them. Fast forward to today and from what i can tell there is no way to set my Xbox One to be region free nor would I probably want to so I was looking for a way to create a NTSC DVD from a PAL one. Read many tutorials and they all seemed VERY complicated using multiple tools.
I decided to try things on my own and was able to do it using two tools:
Basically I used DVD Decrypter to remove the region and copy the DVD files to my hard drive and then Nero Recode to burn them back to a DVD-R. Works perfectly with all the menus intact and everything.
Gonna go watch season 1 now! 🙂
Hit another snag on the iOS 12 Beta this morning. Seems that when i go to update my Apple Watch, it throws an error stating that my iPhone “Could Not Connect to Apple Watch”. Tried multiple various things including rebooting both devices, install the beta profile on my watch and find found that if you remove the beta profile from your iPhone, restart it and then try to update the watch, it works. Then you can just reinstall the Beta profile again and your good to go. Other than that I’m not seeing any new bugs with Beta 2.
So i installed the new iOS 12 Beta 1 and everything worked fine for a while and was impressed by the new features but after 24hrs my GPS stopped working on any application that used it. Waze, Apple Maps, Google Maps, etc. Tried everything, researched and people had luck turn off/on locations services, resetting network, open multiple GPS using apps all at once, multiple different things and I tried all of them with no luck. What I found is that it was hit or miss. I would open an app and it worked, an hour later it wouldn’t work. I believe that all those people that were resetting and trying multiple things just happened to hit a time when it was working. Good news is that with Beta 2 it looks like it’s resolved.
So I decided to downsize my environment and got rid of my desktop, server and multiple other devices. So all I have now is my Alienware laptop and an old desktop I built with Server 1709 to play around with. Well since i no longer have a Domain, I was having major problems connecting to it remotely from my laptop.
Luckily I stumbled on to this post that walked me through the security setup and I’m now good to go.
Quick and Dirty commands but keep in mind this adds ALL to the trustedhosts. If you want to lock it down, change * to “FQDN-HyperV-Server”
On Hyper-V Server:
On Computer you want to manager Hyper-V Server from:
When trying to access the admin shares on my systems, after removing them from the domain, I found that only the local administrator account was able to access them. It seems this is by design and you need to turn off Remote UAC from the registry.
Here is the article: https://support.microsoft.com/en-us/help/951016/description-of-user-account-control-and-remote-restrictions-in-windows